Vendor Documentation
Click VENDOR REGISTRATION and select your subscription plan
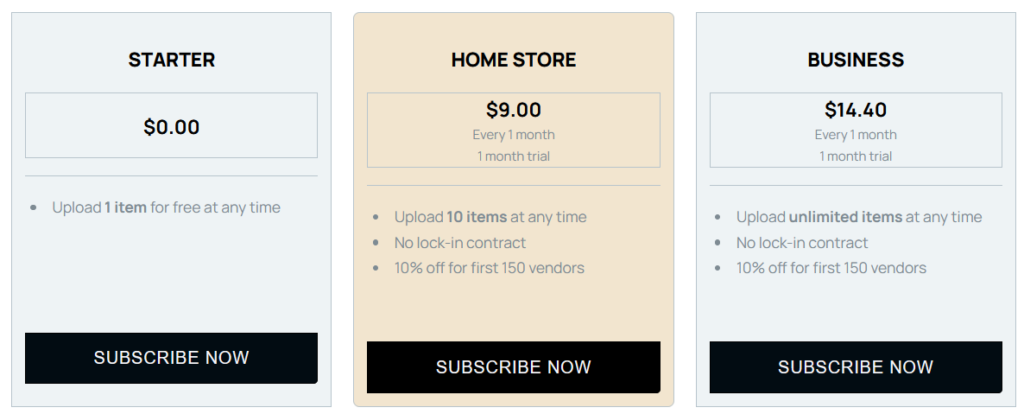
Then enter the email and password you would like to associate with your account. Note this is the email/password you will login with going forward.

Complete your billing and payment details, and confirm your subscription by clicking the ‘Subscribe Now’ button.
Once your payment is complete, you will be redirected to the store setup wizard. We recommend you go ahead and setup your store at this point but you can do this at a later date.
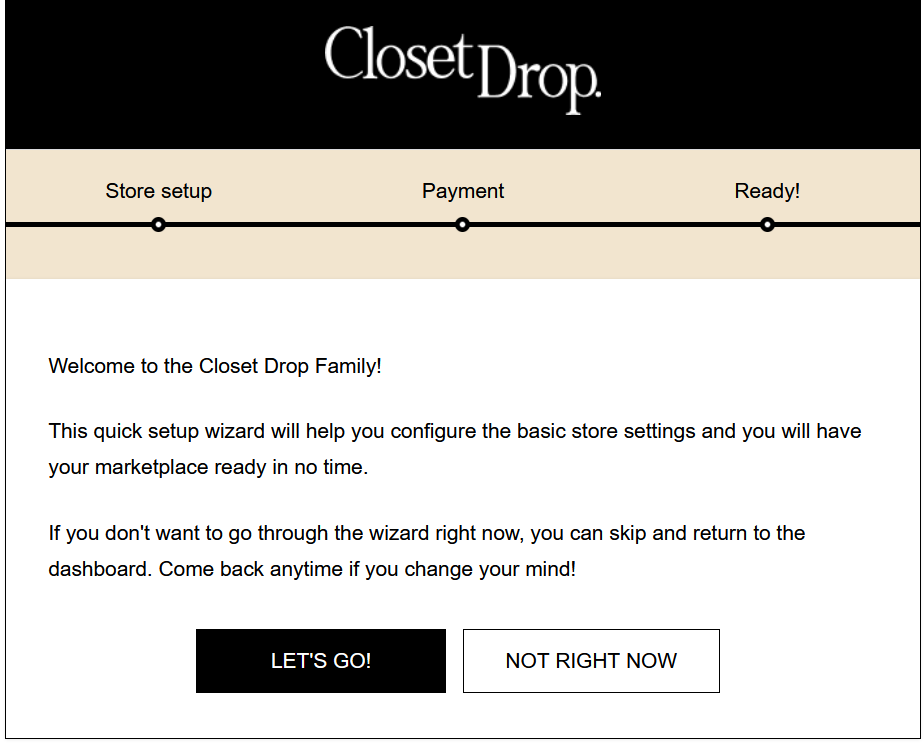
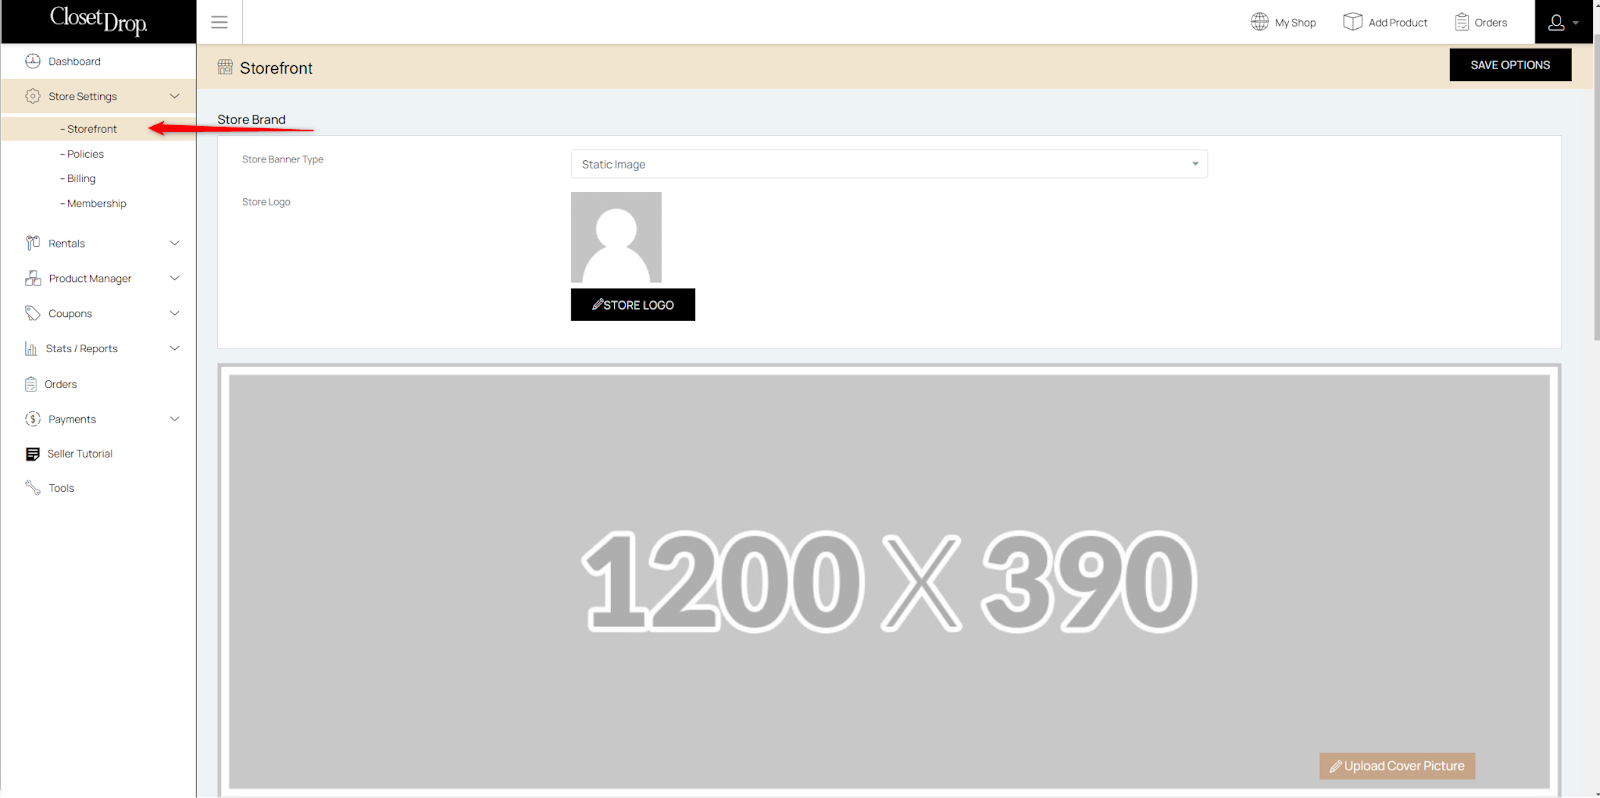
Once you have finished the setup wizard, the first step is to visit your dashboard and go to Store Settings > Storefront. Here you can add the logo, cover photo, store description. The recommended size for your cover photo is 1200px by 390px. Note you can also customise your store URL, we recommend putting your business name in the URL.
Connect Facebook chat
If you would like to connect facebook chat to your profile, you first need to whitelist our domain with the following steps:
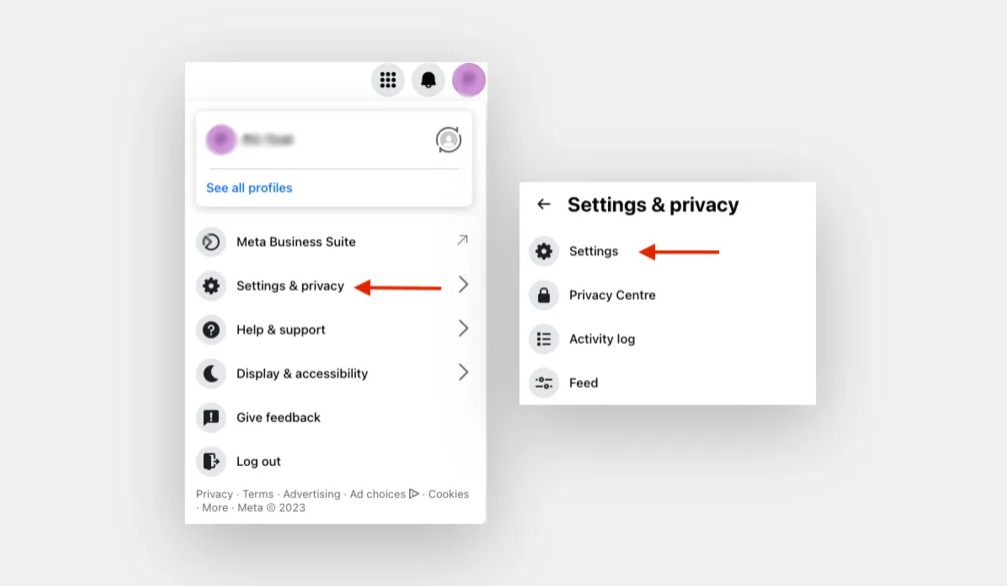
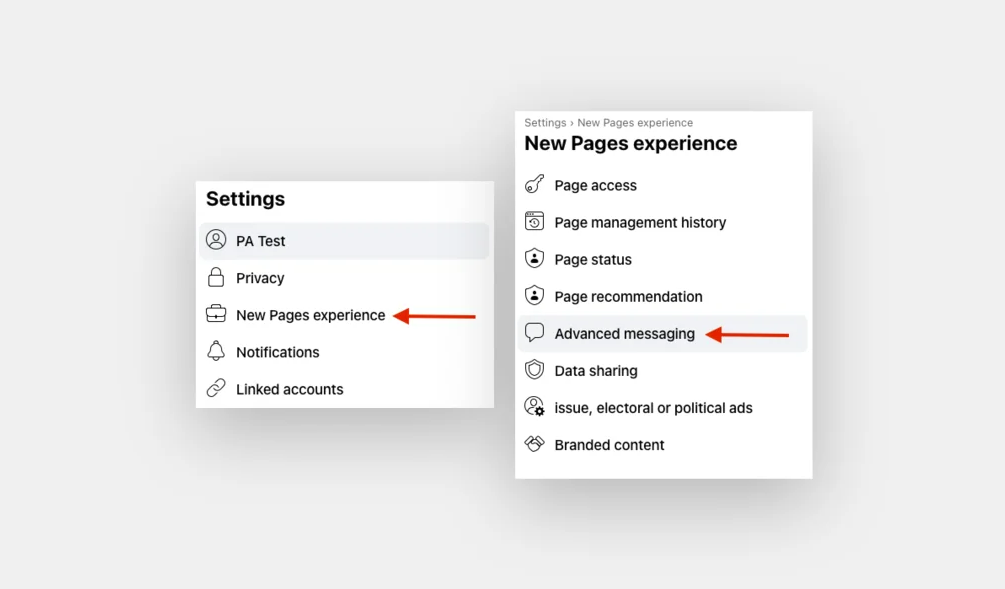
Login to your Facebook Page and click on Settings & Privacy -> Settings in the top right corner.
In Facebook Page Settings on the Left, Select New Pages Experience -> Advanced Messaging.
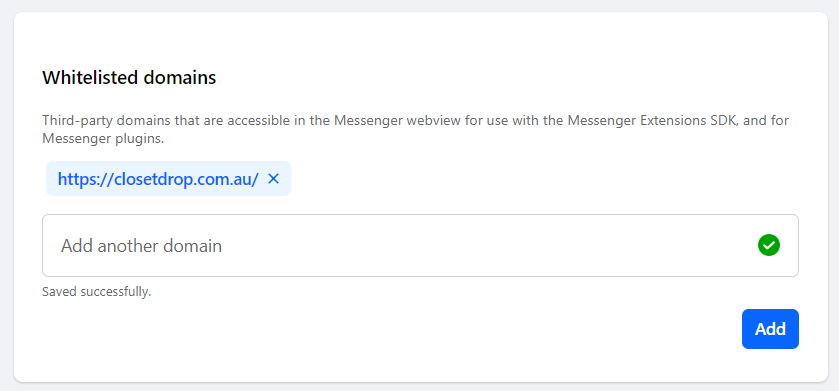
Scroll to “White-listed domains”, and add our domain name here and click ‘add’ https://closetdrop.com.au
Then Click this link to find your page ID then enter it into Store settings and enable the live chat. Once complete, click the ‘Save Options’ button in the top RHS.

Policies
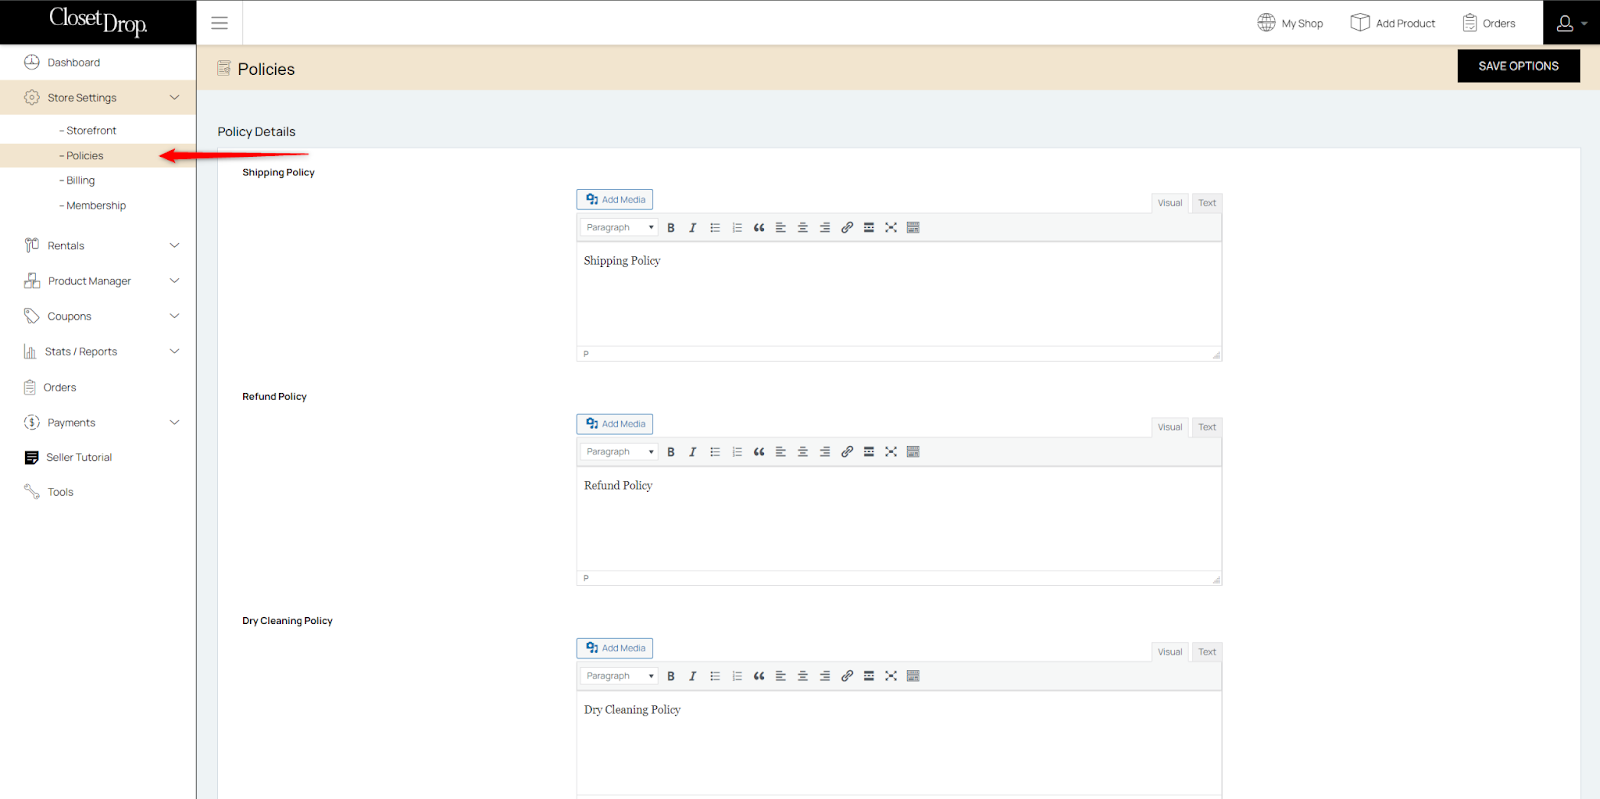
Next, head over to the Policies tab and add your Shipping Policy, Refund Policy and Dry Cleaning Policy. These will appear on your product pages. Then click ‘Save Options’
Billing
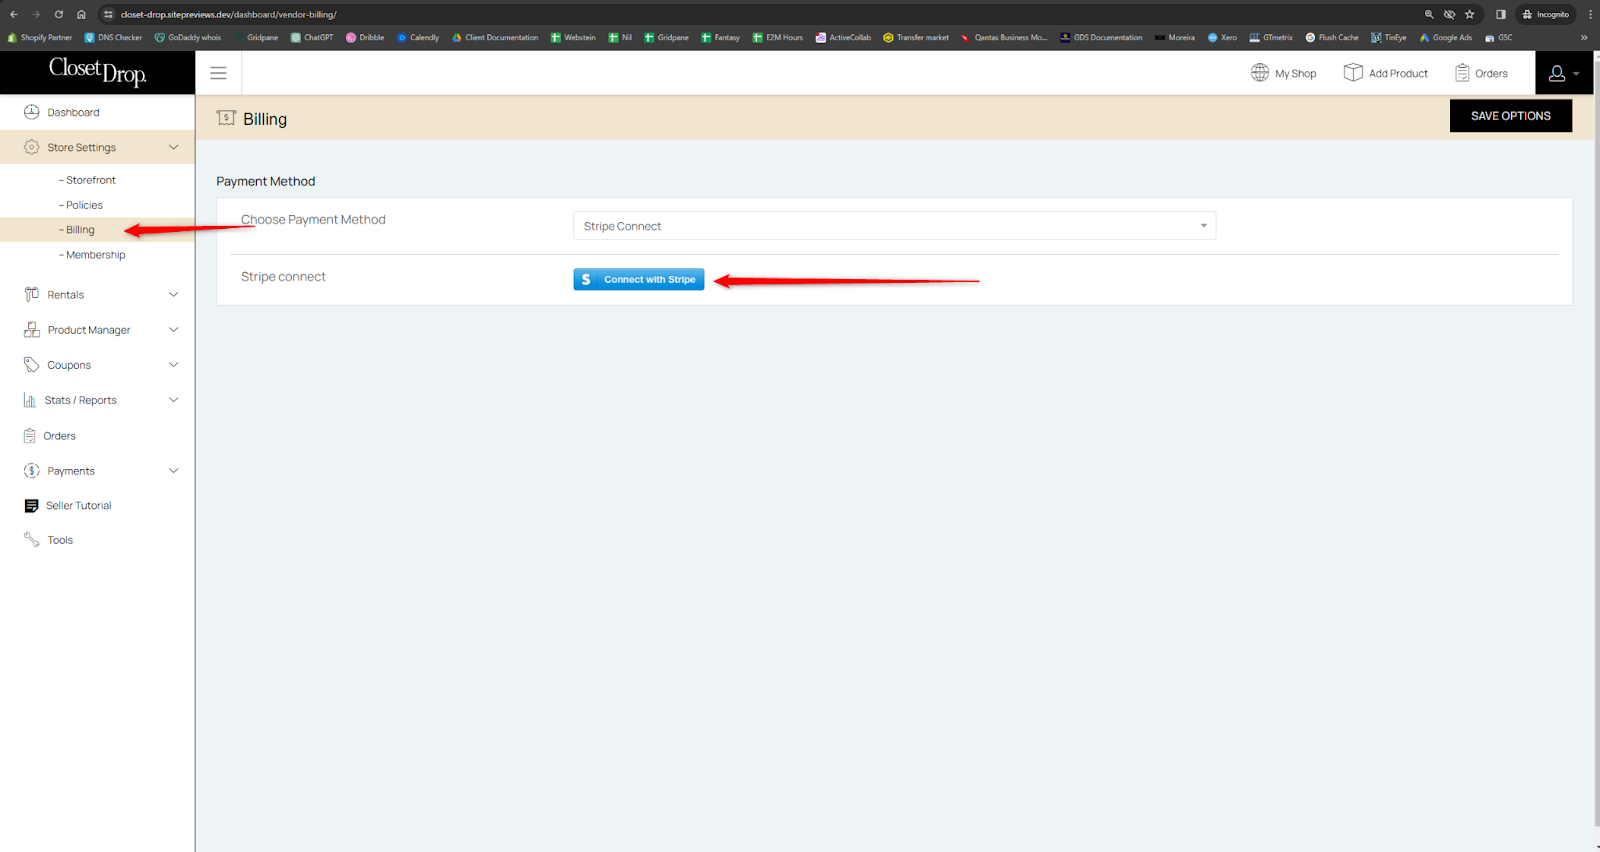
Next, head over to the Billing tab and click the ‘Connect with Stripe’ button and follow the prompts. This will ensure direct payments from customers into your Stripe account.
Membership
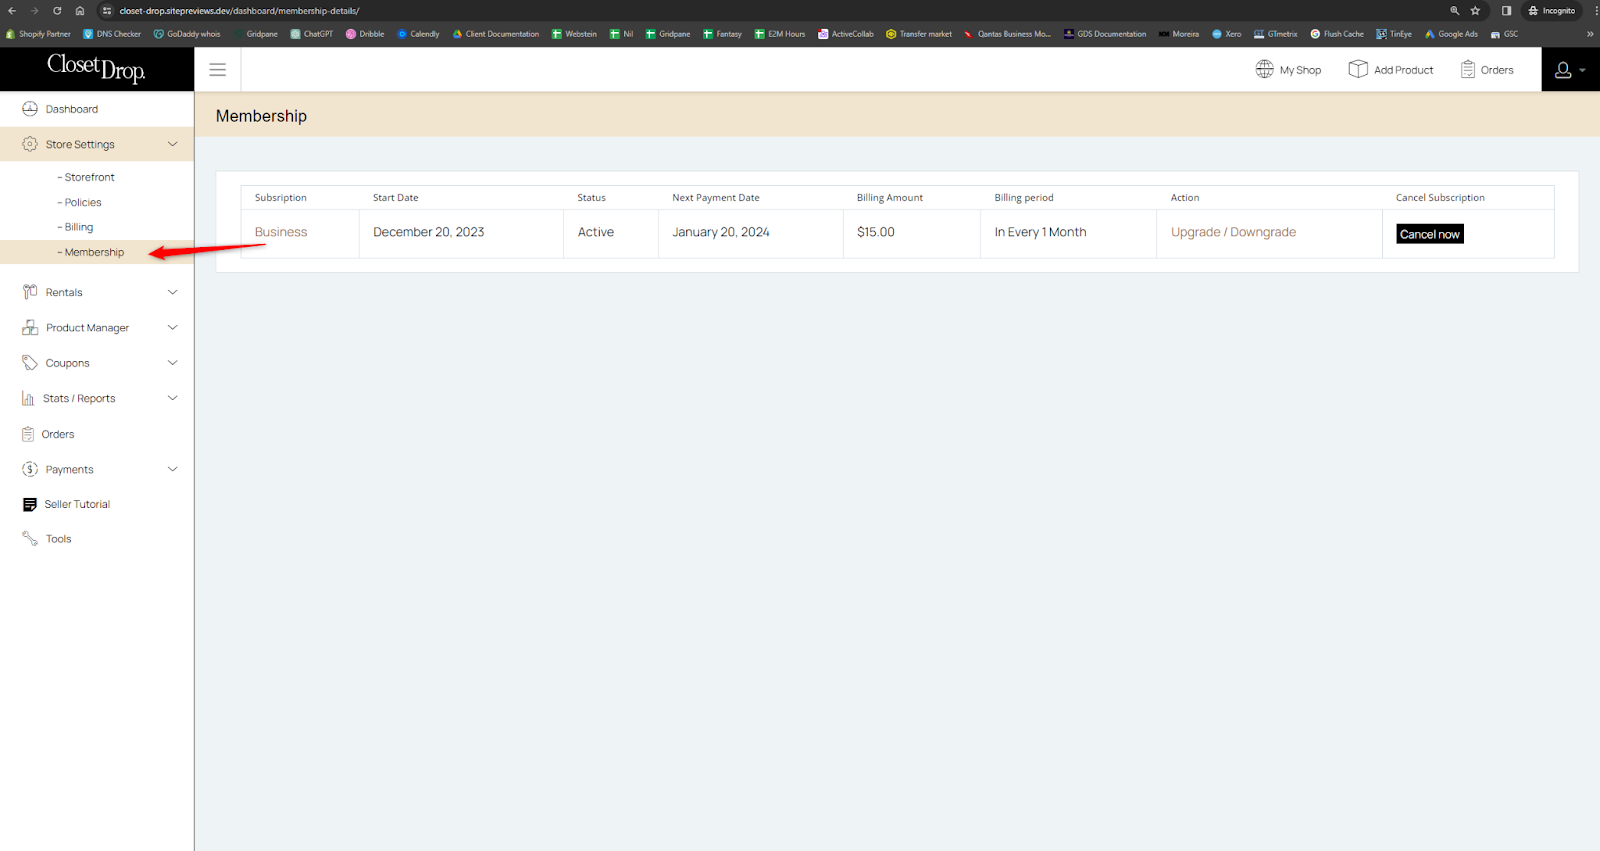
The membership tab will show your current membership plan. You can also upgrade/downgrade or cancel from this page.
Please see a few notes before you start:
- You must complete this step BEFORE you create a new product.
- You must complete a separate inventory and product page for each size the item is available in.
Once your store has been setup, you are now ready to start adding inventory for products you would like to make available for rent.
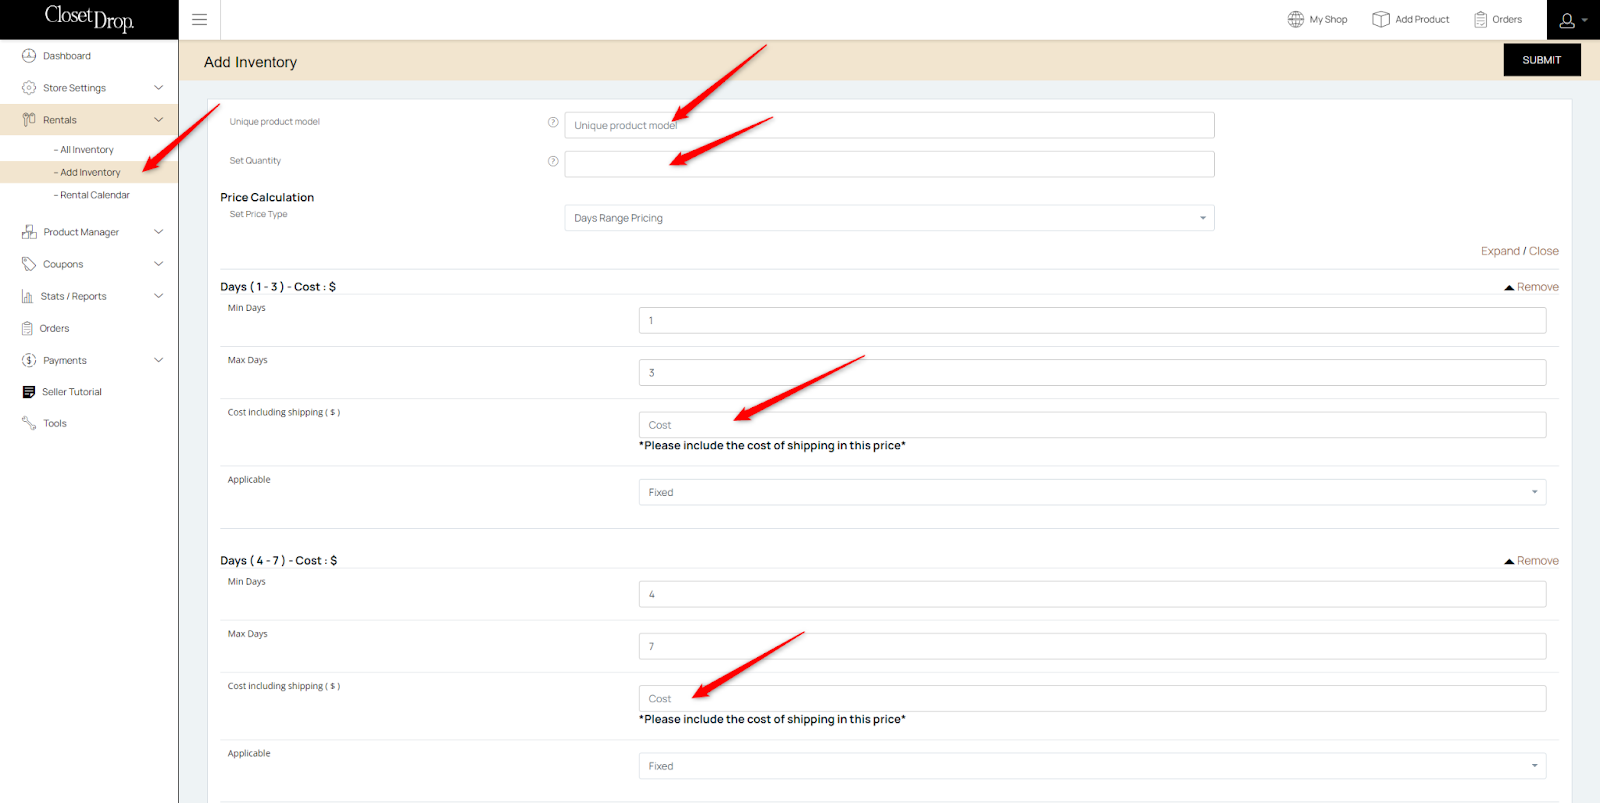
To add new inventory, go to Rentals > Add Inventory. Set a unique product model (name of product), quantity of items, and add the costs for the pre-defined hire length ranges of 1-3 and 4-7 days. Ensure to include the cost of shipping in this price. Then click SUBMIT.
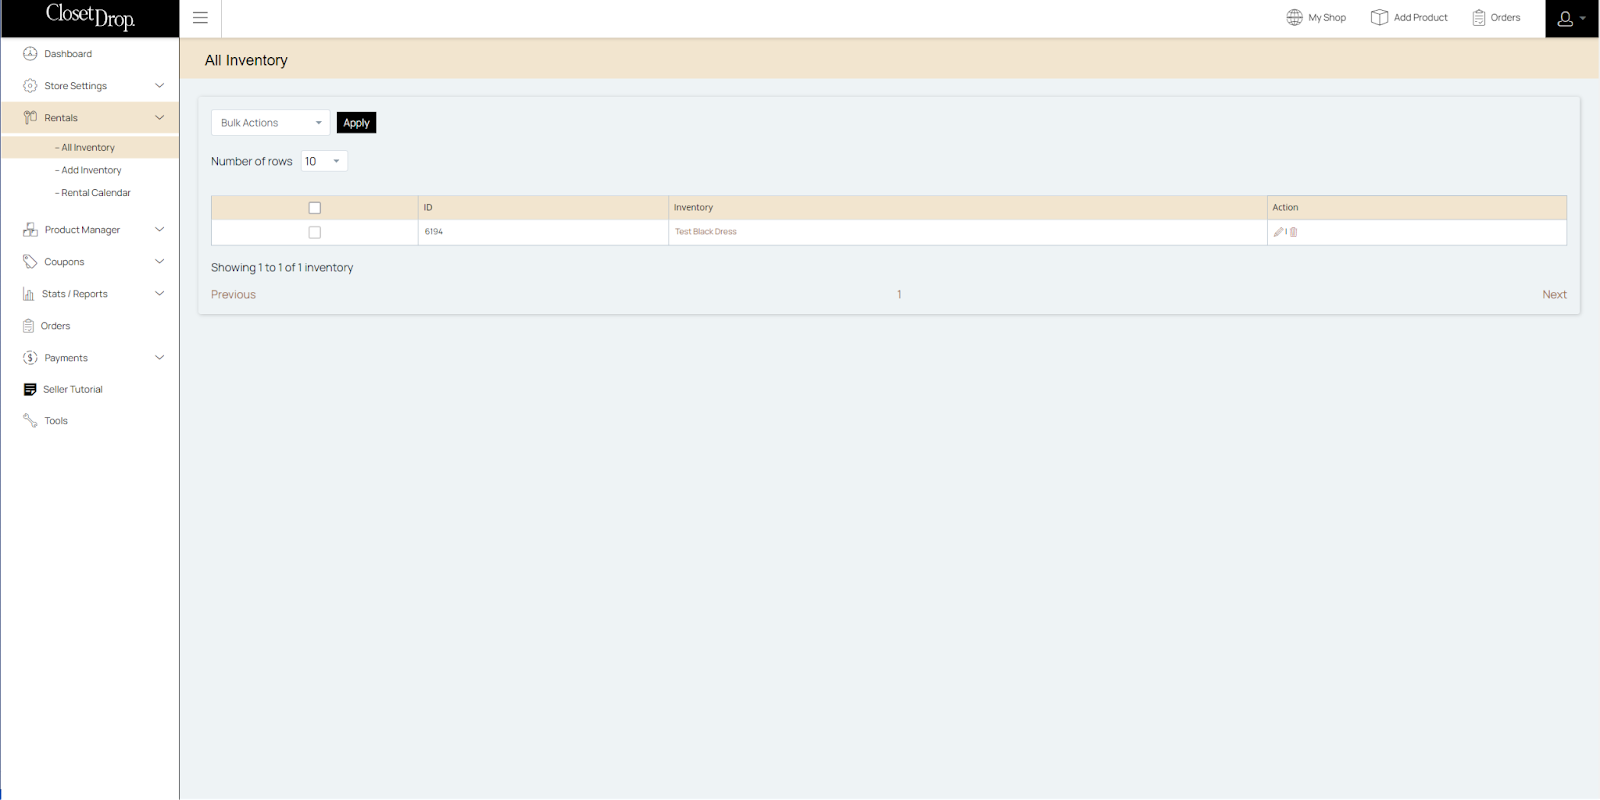
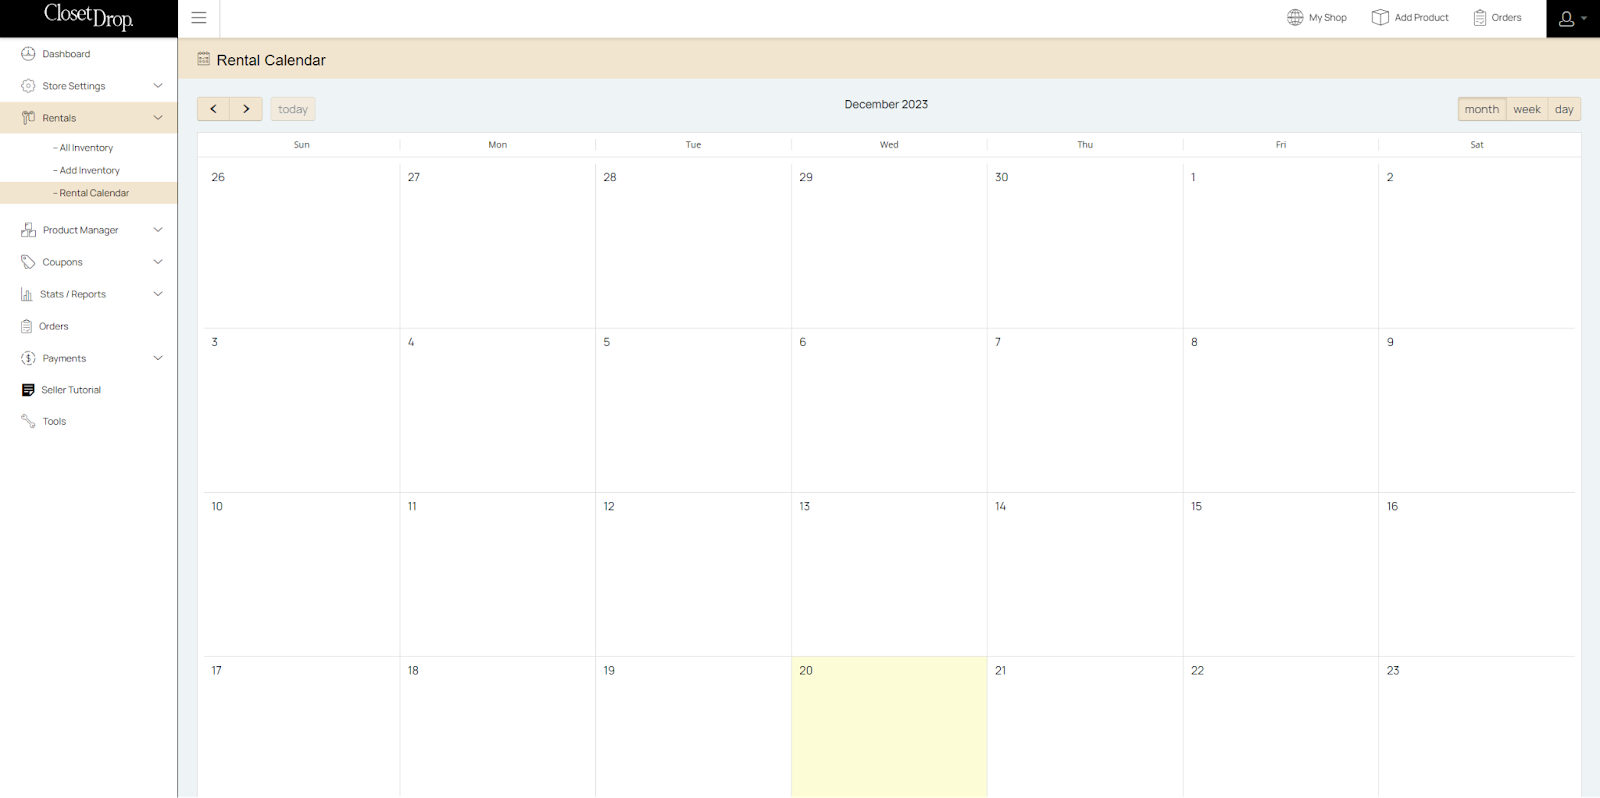
The ‘All Inventory’ tab will keep a log of all the inventory you have submitted, and the ‘Rental Calendar’ shows a visual calendar of when your inventory has been rented.
NOTE: you cannot submit this without first adding your inventory.
Now that you’ve setup your inventory, its time to create a product page. To do this, head over to Product Manager > Add Product. Here you will add the product title, description, images, inventory (select from dropdown), size, categories, designer, occasions.
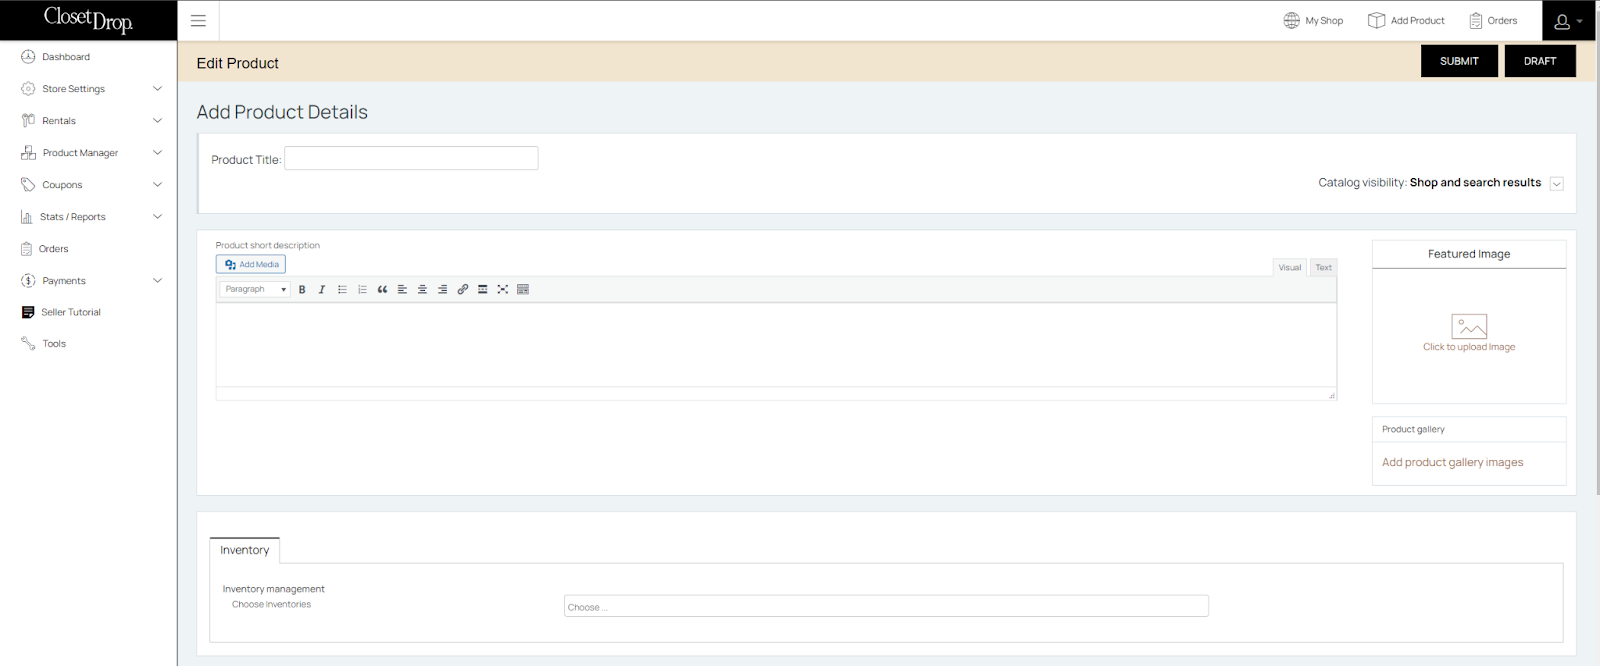
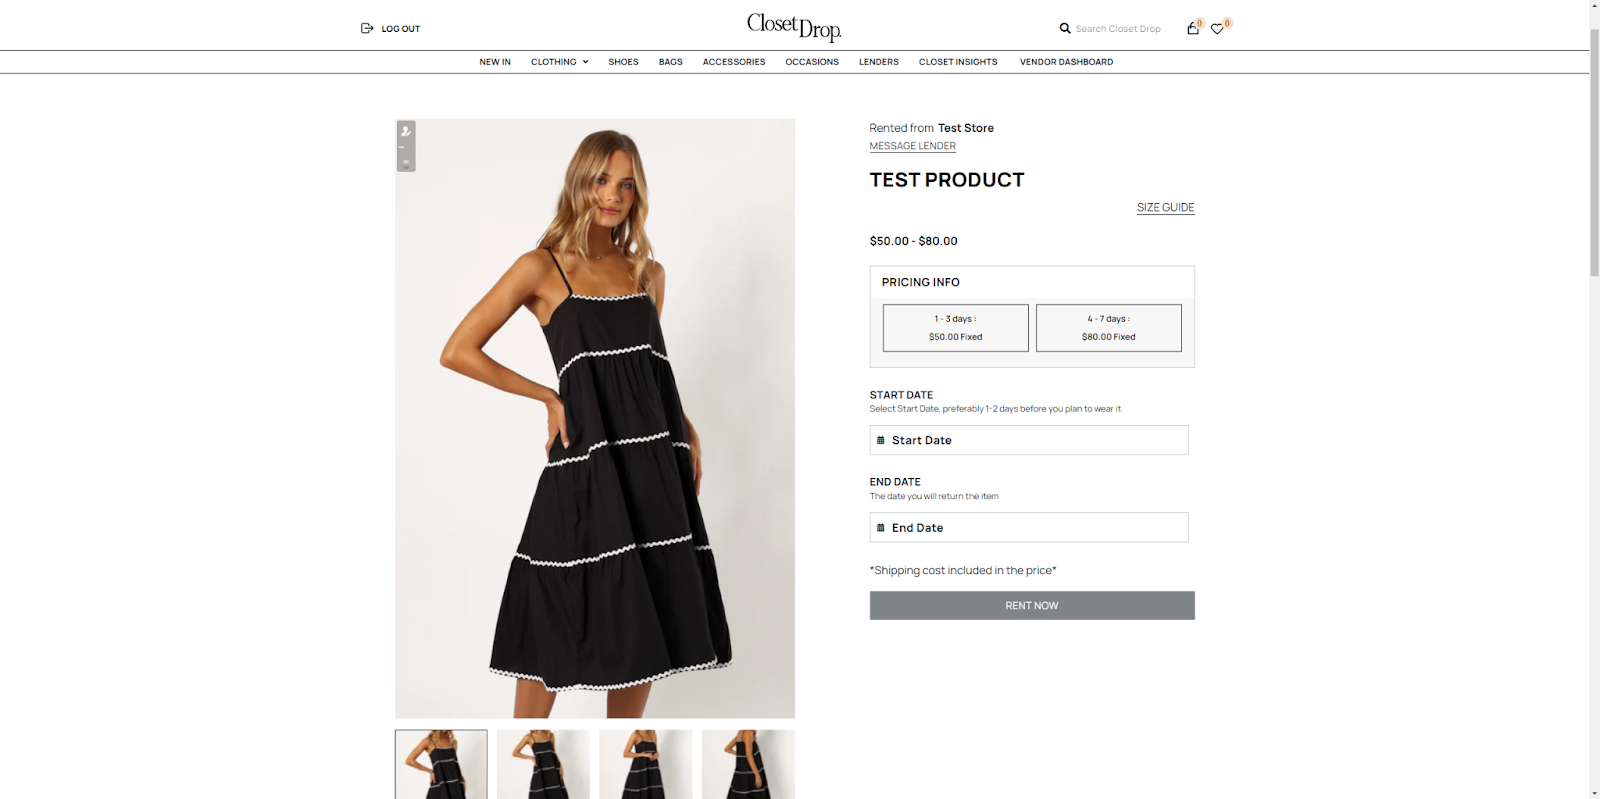
Now you can either save the product as a draft to finish later, or click SUBMIT when you’re done. At this point your product will be under review by Closet Drop admin, but you can review it and will be notified via email when your product is published. You can also view your product’s status under ‘All products’.
Dashboard
Your dashboard provides a quick summary of your account with key stats, orders pending shipping, product rales reports, your withdrawable balance and the statuses of your products.
Stats/Reports
This tab is an extension of the dashboard with further stats specific to sales.
Orders
When a customer orders on of your products, you will first receive an email but the order will also be visible under the Orders tab. This page will give you all the information you need to process and ship the order to your customer.
Payments
The payments tab gives you a summary of all payments processed on your store. There is also a refund tab should you need to refund a customer.
Coupons
The coupons tab allows you to view and create your own coupons for your customers. Any coupon you create here will only be applicable to products in your store. For each coupon, the following fields are mandatory:
- Discount type
- Coupon amount
- Products (this is under usage restriction)
Further options are available but optional. We recommend testing a coupon you create to ensure it offers the discount you intended it to. For more on coupons, please refer to this documentation.

